
Oct 19, 2026
Paper Gift Bag Reinforced Handle Patch: Material, Adhesive and Pull-Test Guide
A buyer's guide to specifying reinforced handle patches, adhesive compatibility, sample pull tests and approval criteria for custom paper gift bags.
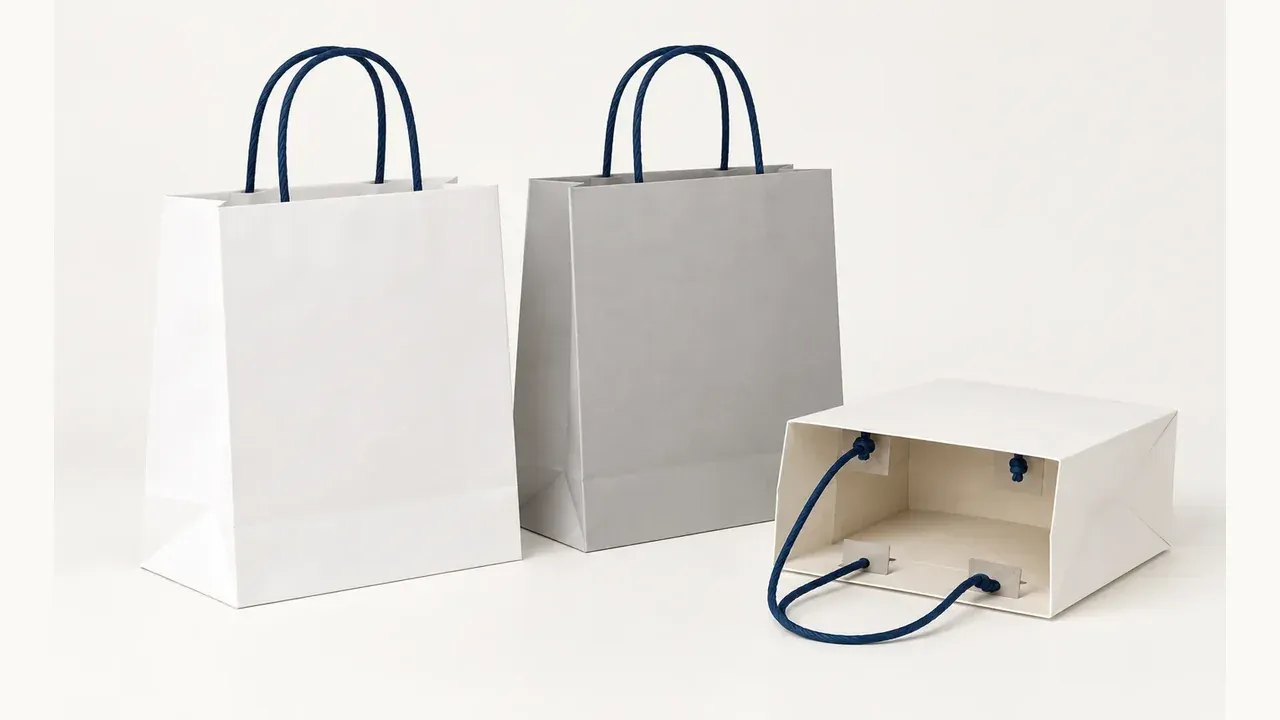
Paper gift bags often fail at the point where the handle meets the bag, not because the handle itself was poorly chosen. The inside reinforcement, adhesive system, paper construction and the way the bag is loaded all work together. For buyers, a clear handle-patch specification is more useful than asking for a bag to be “strong.”
This guide explains how to request a comparable quotation and approve a representative sample for logo-printed paper gift bags. It does not assume one patch material or pull result suits every bag size, handle type, product weight or packing environment.
Start with the use case, not the handle name
Tell the supplier what the bag will carry, how customers will hold it and whether the bag is intended for one short handover or repeated use. A boutique apparel bag, a bottle gift bag and a multi-item retail bag place different stresses on the handle area. State the finished bag dimensions, gusset, planned product arrangement and whether sharp product corners need an insert or protective wrap.
Also identify the handle format: twisted paper rope, cotton rope, ribbon, flat paper handle or another construction. The same outer handle can require a different patch when the bag paper, top fold or attachment position changes.
Specify the bag paper, top fold and patch as one construction
The patch is only one part of the load path. Ask the quotation to identify the bag paper, the top turnover or folded rim, the patch material and its placement behind each handle attachment. If the bag has a laminated surface, special coating or heavy ink coverage, request confirmation that the selected adhesive is compatible with the material below the patch.
For a printed private-label bag, include artwork zones near the handle and the inside of the top fold. A reinforcement can change the local stiffness or show through on a light paper, so the appearance should be reviewed at the same time as strength.
Describe the attachment method and adhesive boundary
Ask how the handle is attached and how the patch supports that attachment. The supplier should state whether the handle passes through holes, is knotted, glued, or uses another method. It should also explain which surfaces are bonded and whether the patch is applied before or after printing, folding and lamination.
Avoid approving an adhesive description alone. A material that bonds well to an untreated sample may behave differently after a surface-finish change, a revised top fold or an extended storage period. If a construction is substituted, treat it as a new sample decision rather than an invisible production adjustment.
Plan a representative pull and carrying trial
The best sample test reflects the real bag, product arrangement and user motion. Fill sample bags with a representative, safely contained load; lift them by the intended handle; set them down; and repeat the motions that occur at checkout, packing and normal carrying. Observe the patch, handle attachment, top fold and bag panel together.
Record the acceptance observations in plain language: tearing, adhesive lift, hole elongation, crease cracking, handle movement, visible show-through or loss of shape. Agree whether the trial is visual only or whether the buyer requires a documented internal test method. Do not import an arbitrary pull-force target without confirming that it fits the bag, contents and market requirements.
Check print registration and presentation after the trial
Logo placement can make a structurally acceptable bag look inconsistent if the handle is not centred relative to the front artwork. Review a filled, handled sample from the customer-facing side. Check the logo, foil or other print treatment for registration, scuffing and any distortion around the top fold.
When a dark print, foil stamping or textured finish is used, include the completed handle area in the approved master sample. A flat colour swatch does not show how the final construction will look when the bag is loaded and carried.
Use the sample to control MOQ, timing and repeat orders
MOQ, production schedule and delivery planning depend on the selected construction, material availability and finishing steps. Submit the approved size range and artwork together so the supplier can advise which elements share a production run and which require separate setup. Build sample approval into the launch plan before fixing a delivery date.
For repeat orders, reference the approved sample and require written confirmation before changing bag paper, rope, patch, adhesive, top-fold geometry or printing process. This keeps a cost or availability change from becoming an unreviewed performance change.
Quotation checklist
• [ ] Finished bag width, gusset, height, product arrangement and intended use
• [ ] Bag paper, top-fold construction, surface finish and logo-printing method
• [ ] Handle type, colour, attachment method and placement relative to the front artwork
• [ ] Reinforcement-patch material, dimensions, location and adhesive compatibility
• [ ] Representative filled-sample plan and agreed observations for handle, patch and top fold
• [ ] Appearance review for show-through, registration, scuffing and loaded-bag presentation
• [ ] Approved master sample and written change control for paper, handle, patch or adhesive
• [ ] MOQ, sample timing, production schedule, carton packing and delivery destination