
Oct 26, 2026
Paper Gift Bag Die-Cut Handle Holes: Reinforcement and Fold-Alignment Guide
Specify die-cut handle position, reinforcement patches, fold clearance and sample checks for paper gift bags that must look clean and carry reliably.
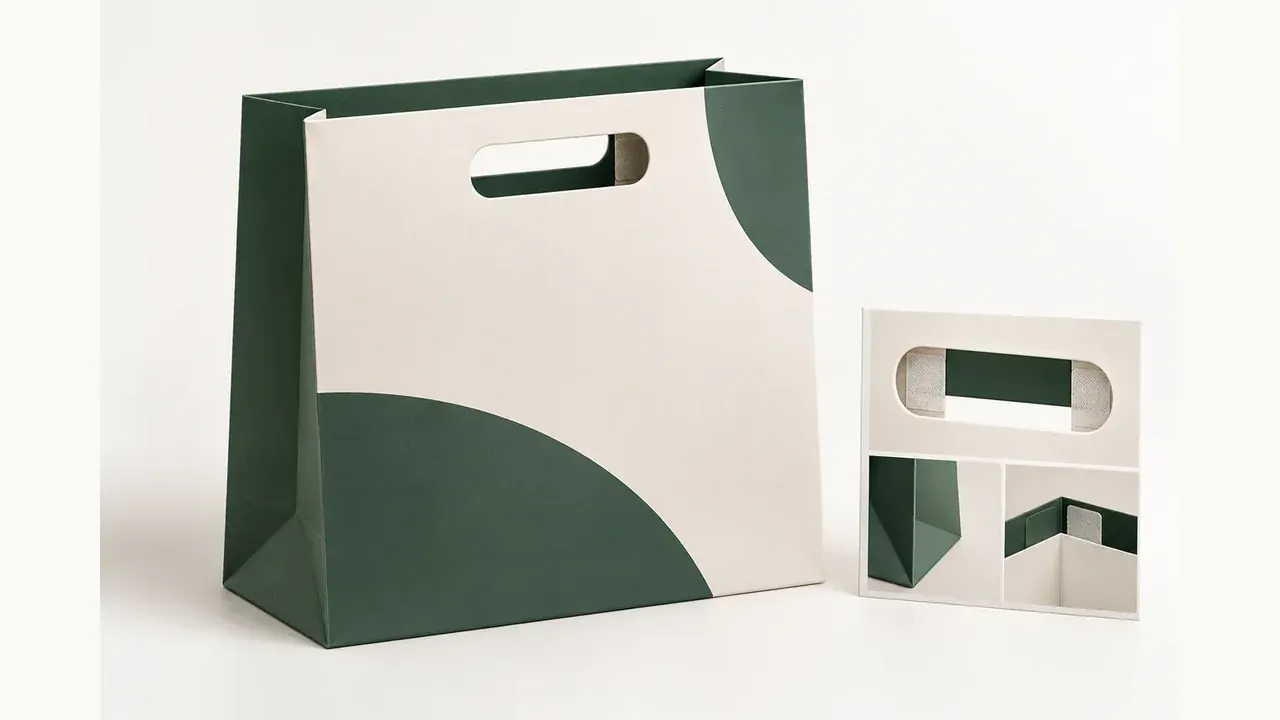
Die-cut handles make a paper gift bag look streamlined, but the handle area combines three production risks: material tearing, reinforcement visibility, and a cut that lands too close to a fold. Treat the handle as a measured construction feature, not a decorative afterthought. A clear artwork file plus a physical pre-production sample is the quickest way to avoid a bag that looks correct on screen but fails in use.
Start with the filled-bag load and carry behavior
Ask what goes into the bag, its maximum packed weight, and whether shoppers will carry it briefly or for a longer distance. Heavy, rigid or sharp-edged items concentrate force at the two ends of a die-cut opening. This affects paper grade, the size of the reinforcement patch, and whether a die-cut handle is appropriate at all. When the item is unusually heavy, compare a reinforced die-cut option with twisted-paper or ribbon handles before locking the structure.
Specify the handle opening and its clearance from folds
Give the supplier a dimensioned drawing rather than relying only on visual artwork. It should state the opening width and height, corner radius, centreline, distance from the top edge, and distance from side folds. Keep the cut clear of the top fold, side gusset score and any glued seam. The required clearance depends on bag size, board stiffness and production tooling, so ask the factory to confirm its workable tolerance before final artwork release.
Choose reinforcement patch material for the bag stock and finish
An internal patch spreads load beyond the cut edge. Specify whether it is matching paper, kraft, white card or another compatible material, together with its approximate basis weight and adhesive expectations. On light-coloured or thin stock, test whether the patch shadows through. On laminated stock, confirm the adhesive bonds to the correct surface. The patch should sit symmetrically behind the opening and remain hidden when the bag is held normally.
Align printing, die-cutting and folding as one tolerance stack
Logo artwork near a die-cut handle needs generous visual clearance. A small registration shift can make a border look uneven or push type too close to the opening. Mark no-print zones around the handle, fold and glue areas. If a pattern crosses the front, back and side gussets, request a flat artwork proof that shows panel breaks and the proposed die line. The supplier should review the proof against the bag dieline before printing plates or cylinders are approved.
Inspect a physical sample before production
Open and close the bag, fill it to the agreed test load, and lift it repeatedly from the handle. Look for tearing at the cut ends, patch lift, cracking at the top fold, glue exposure and uneven openings. Inspect the bag from the front, rear and side with the handles naturally resting in place. Approve only after the hole location, symmetry, print clearance and carrying result meet the signed sample criteria.
Include handle details in the quotation request
The handle geometry can affect tool cost, material consumption, make-ready time and production speed. Include it in the RFQ together with bag dimensions, paper type, print colours, finish, order quantity, packing method and delivery destination. Ask whether the quoted MOQ allows the same material and reinforcement construction as the approved sample. This keeps later cost comparisons meaningful.
Quotation checklist
• Finished bag width, gusset and height; confirm whether dimensions are inside or outside measurements.
• Die-cut opening width, height, corner radius and measured offsets from the top edge and folds.
• Paper grade, GSM, coating or lamination, plus internal patch material and adhesive specification.
• Print file with dieline, no-print zones and logo clearance around the handle opening.
• Sample test load, number of lifts, acceptable tear/crack criteria and inspection photos.
• MOQ, sample lead time, bulk lead time, carton packing, shipment method and destination.
The practical approval rule
Do not approve from a rendered mock-up alone. Approve a physical bag after its die-cut position and patch construction are checked under the agreed load. That single decision point protects both shelf appearance and customer carry experience.